
How To Build A Frame For Hand Tufting
Hi everyone! I’ve gotten a lot of questions about what kind of frame I use for my hand tufted projects so I created a simple tutorial to help you get started. You just need a few materials, and the cool thing is, you can create any size frame you want. Dream big friends!
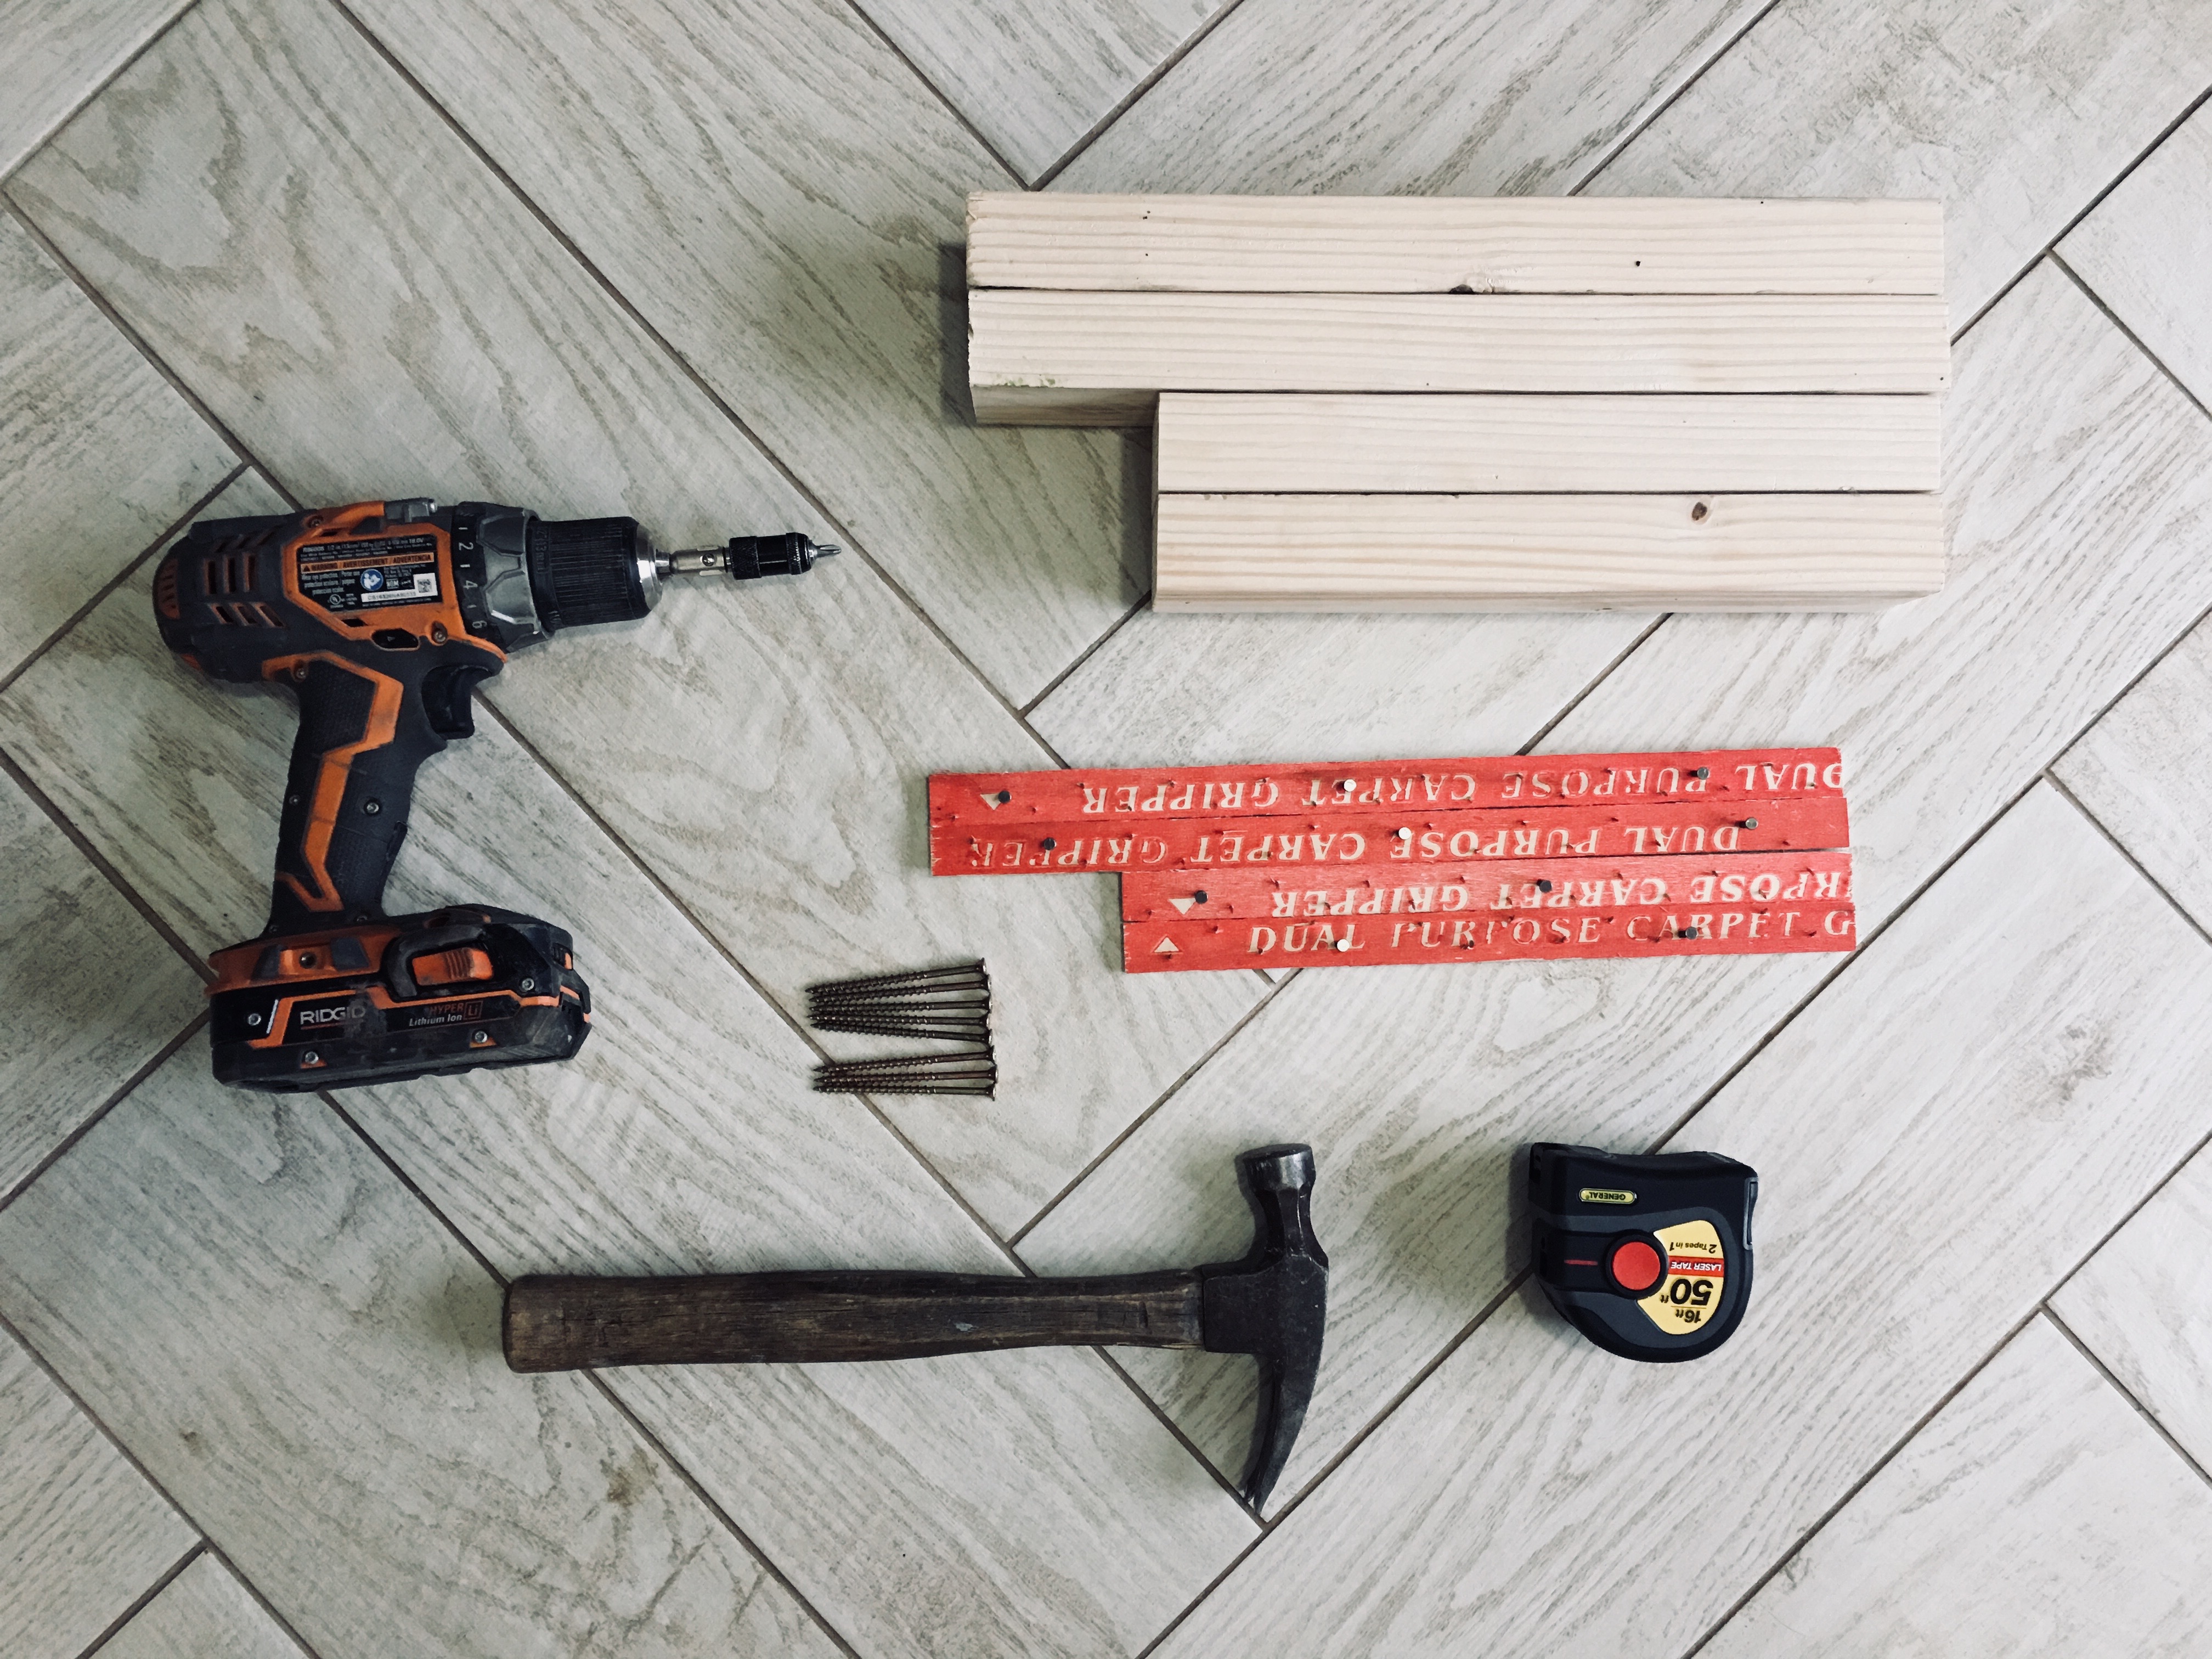
Materials
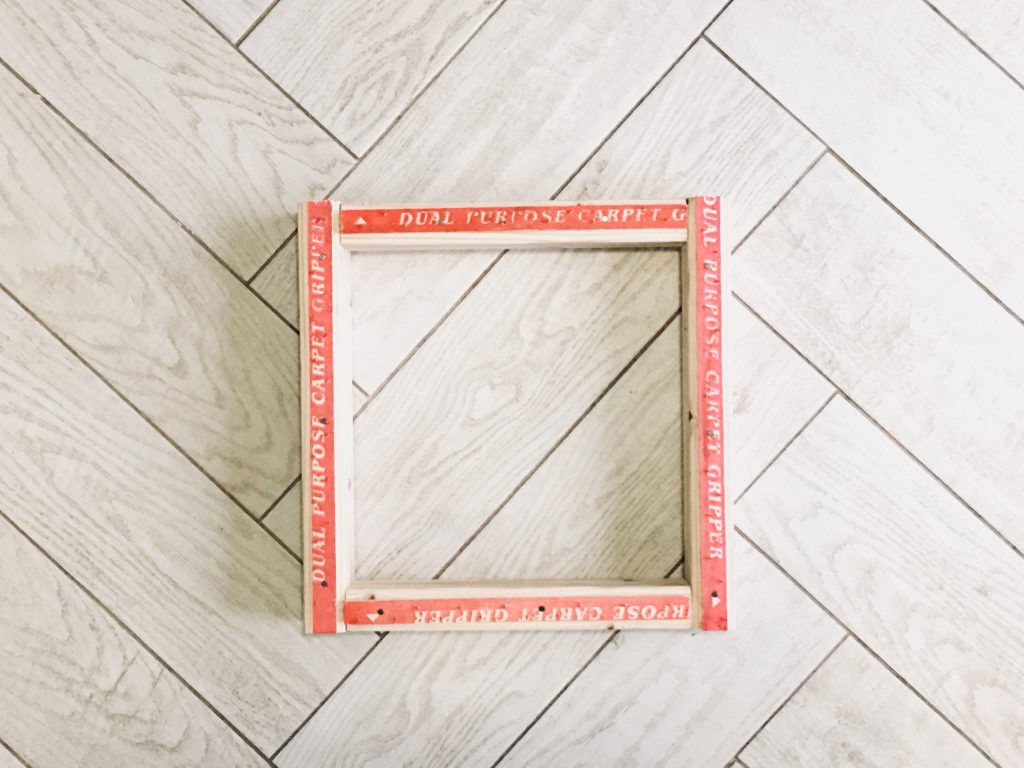
(4) pieces of 2×3 wood- cut to your dimensions
(4) carpet tacking strips cut to the same dimensions as your wood- if you are making a large frame you may want to create 2 rows of the staggered nail boards
(8) 3 inch screws
drill gun
hammer
Step 1
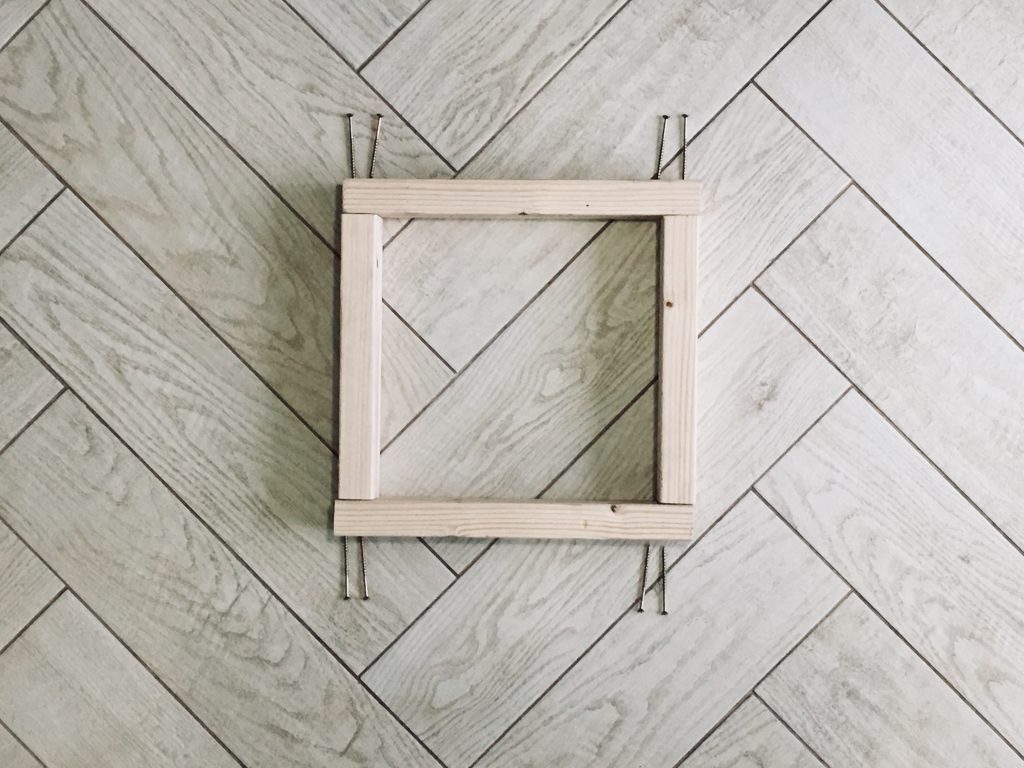
AFTER you cut the wood to your dimensions, assemble the frame using butt joints and two screws per side.
Step 2
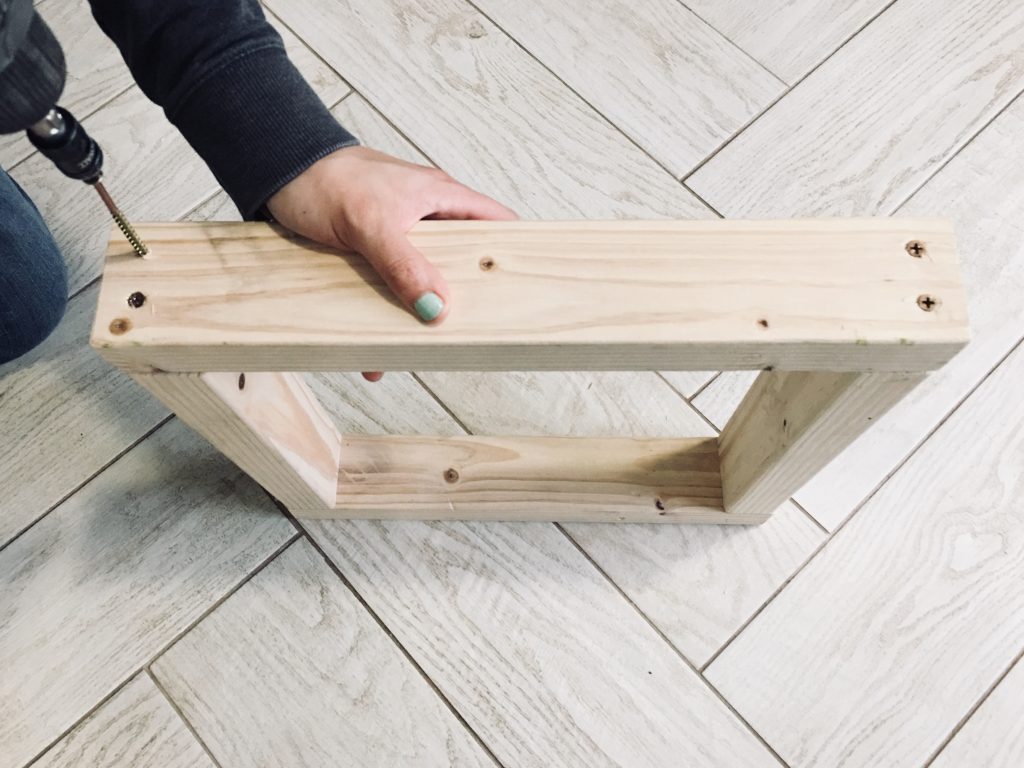
Using your drill gun, screw in each side.
Step 3
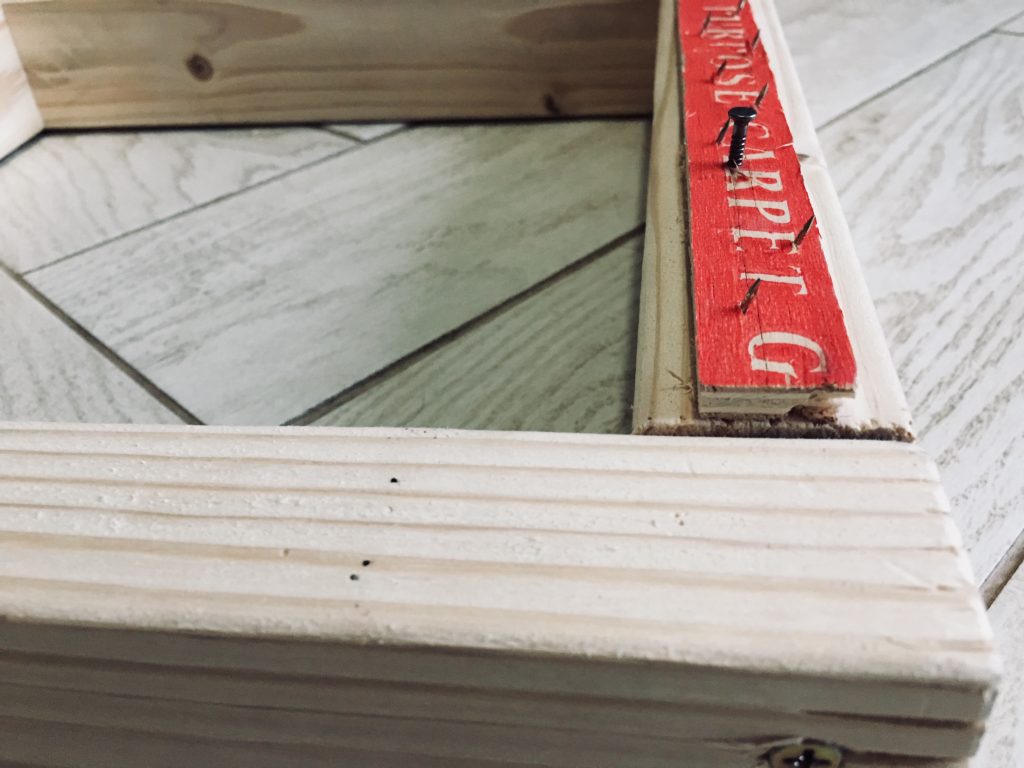
Align the tacking strips on the wood, leaving a little space on both sides. It’s important that the nails are pointing outward because that is what keeps the backing material tight and in place. Nail that baby down.
Did I mention it was really simple? Now you’re ready to stretch your backing material onto the frame. Happy tufting!
Look out for the next tutorial: Different Backing Fabrics For Hand Tufting